Configuring Resolve Actions Express for SAML SSO
Configuring Resolve Actions Express to allow SSO from a SAML IdP is a multi-step process:
- Synchronize with AD
- Convert Recipients to Logins
- Enable SSO
Synchronizing with AD
Before you enable SSO, you need to synchronize Actions Express with your AD. This step creates a recipient for every AD user of group that you choose to synchronize. After synchronizing with AD, the following recipients will appear under Main Menu > Repository > Recipients:
- In the Users table, a recipient for every individual AD user or AD group member that you synchronize.
- In the Groups table, a recipient for each parent AD group that you synchronize and each child AD group within those parent groups.
After you create the recipients, you will turn them into logins in the next step of the configuration process.
While all account types can be synced to Actions Express, the following types cannot log in:
Windows Server AD:
- External Azure Active Directory
- Microsoft Account
Azure AD:
- External Azure Active Directory
- Windows Server AD
- Microsoft Account
For groups, only security groups synced from AD can be used to create Login Groups in Actions Express. Distribution groups are not supported in this manner.
Below, we will see how to configure two of the supported Active Directory synchronization options - Windows Server AD and Azure AD.
Setting Up Windows Server AD Synchronization
To create a workflow for synchronizing AD users into Actions Express, proceed as follows:
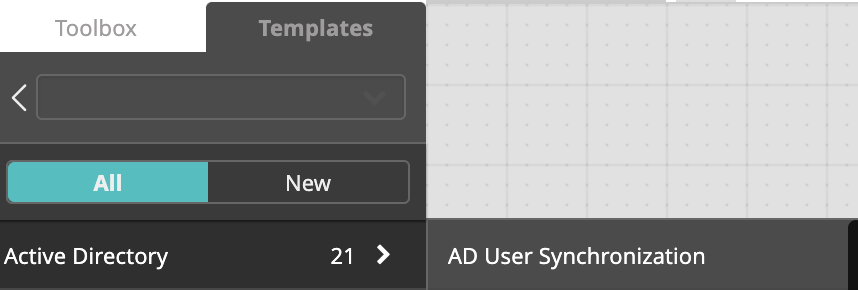
- In the Workflow Designer, create a new workflow using the AD User Synchronization template from the Active Directory templates category.
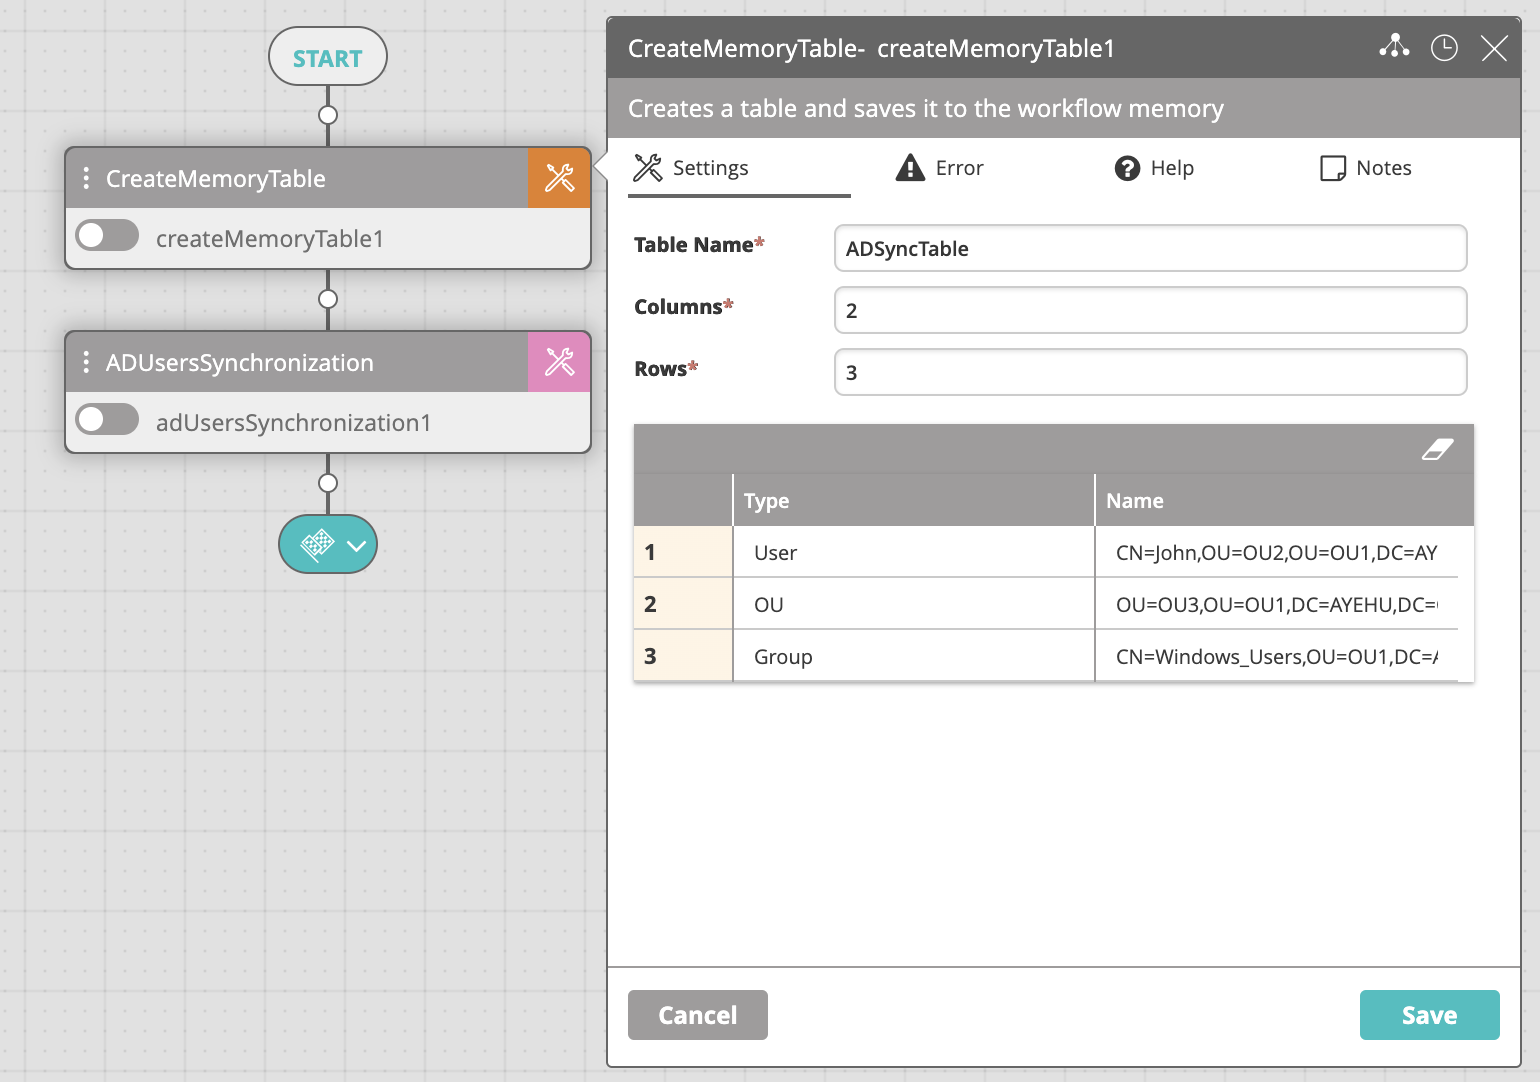
- The workflow will contain two activities: Create Memory Table and Ad Users Synchronization.
- Edit the table in the Create Memory Table activity while maintaining the following guidelines:
- The table must contain only two columns: Type, Name.
- The Type column may be set with one of the following values: User, OU, Group.
- The Name column must be set with the DN (Distinguished Name) to the specified object.
- You may add as many rows to the table as you want.
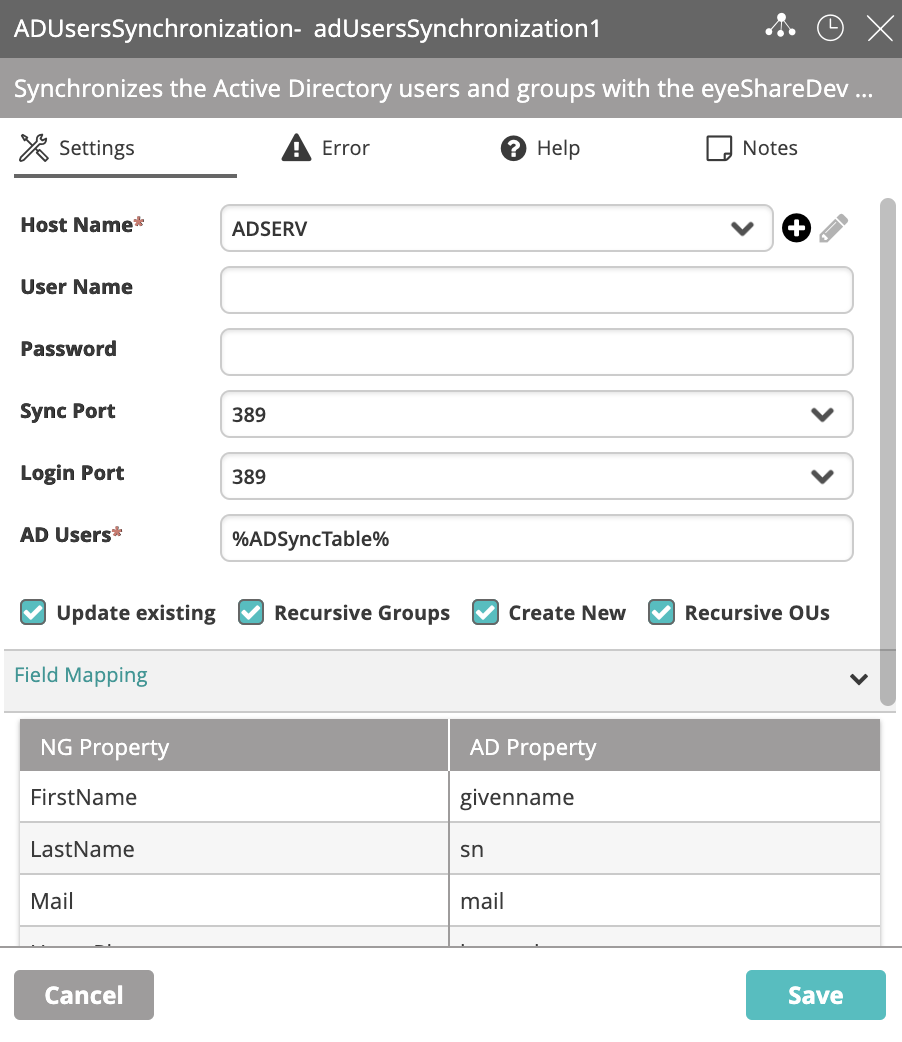
- Edit the AD Users Synchronization activity settings:
- Host Name: A domain controller device that is defined in Incident Configuration > Devices.
- Sync Port: Port used to sync users.
- Login Port: Port used for these users to later log in to Actions Express. For security reasons, some companies require different ports.
- AD Users: The list of AD users/groups to synchronize. This can be static (the object ID for a single user and/or group) or a reference to a memory table created for this purpose.
If we use the above example, the value of this field will be the Table Name field of the Create Memory Table activity:%ADSyncTable%. - Update Existing: By default, if a user or a group already exists (has been created manually before synchronization), they will not be updated. When this is checked, existing users are updated.
- Recursive Groups: When a group is synchronized, you may decide whether to synchronize the data recursively or not. When synchronizing the data recursively, subgroups and user data are also synchronized.
In Actions Express, subgroups appear at the same level as their parent groups. - Create New: If checked, Actions Express will create new users and groups at every next run of the activity after the initial one.
- Recursive OUs: If checked, Actions Express will create or update the OUs recursively.
- Field Mapping: Map Actions Express properties to relevant AD properties. Must be checked when syncing users and groups.
- Run the AD User Synchronization workflow.
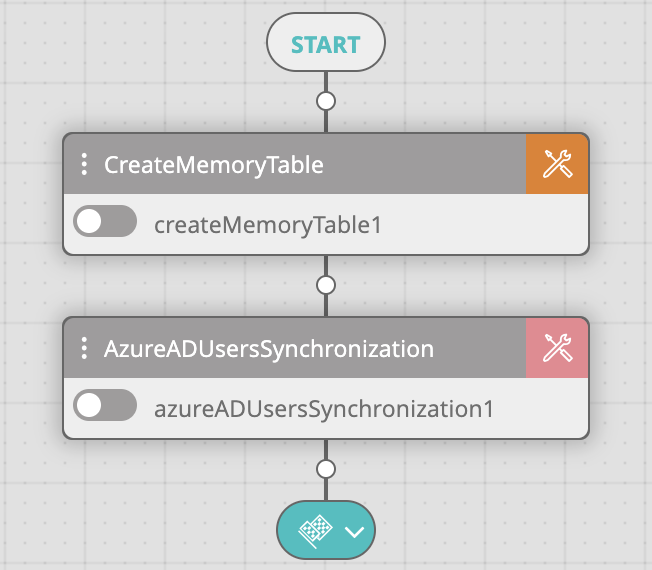
Setting Up Azure AD Synchronization
To create a workflow for syncing AD users into Actions Express, proceed as follows:
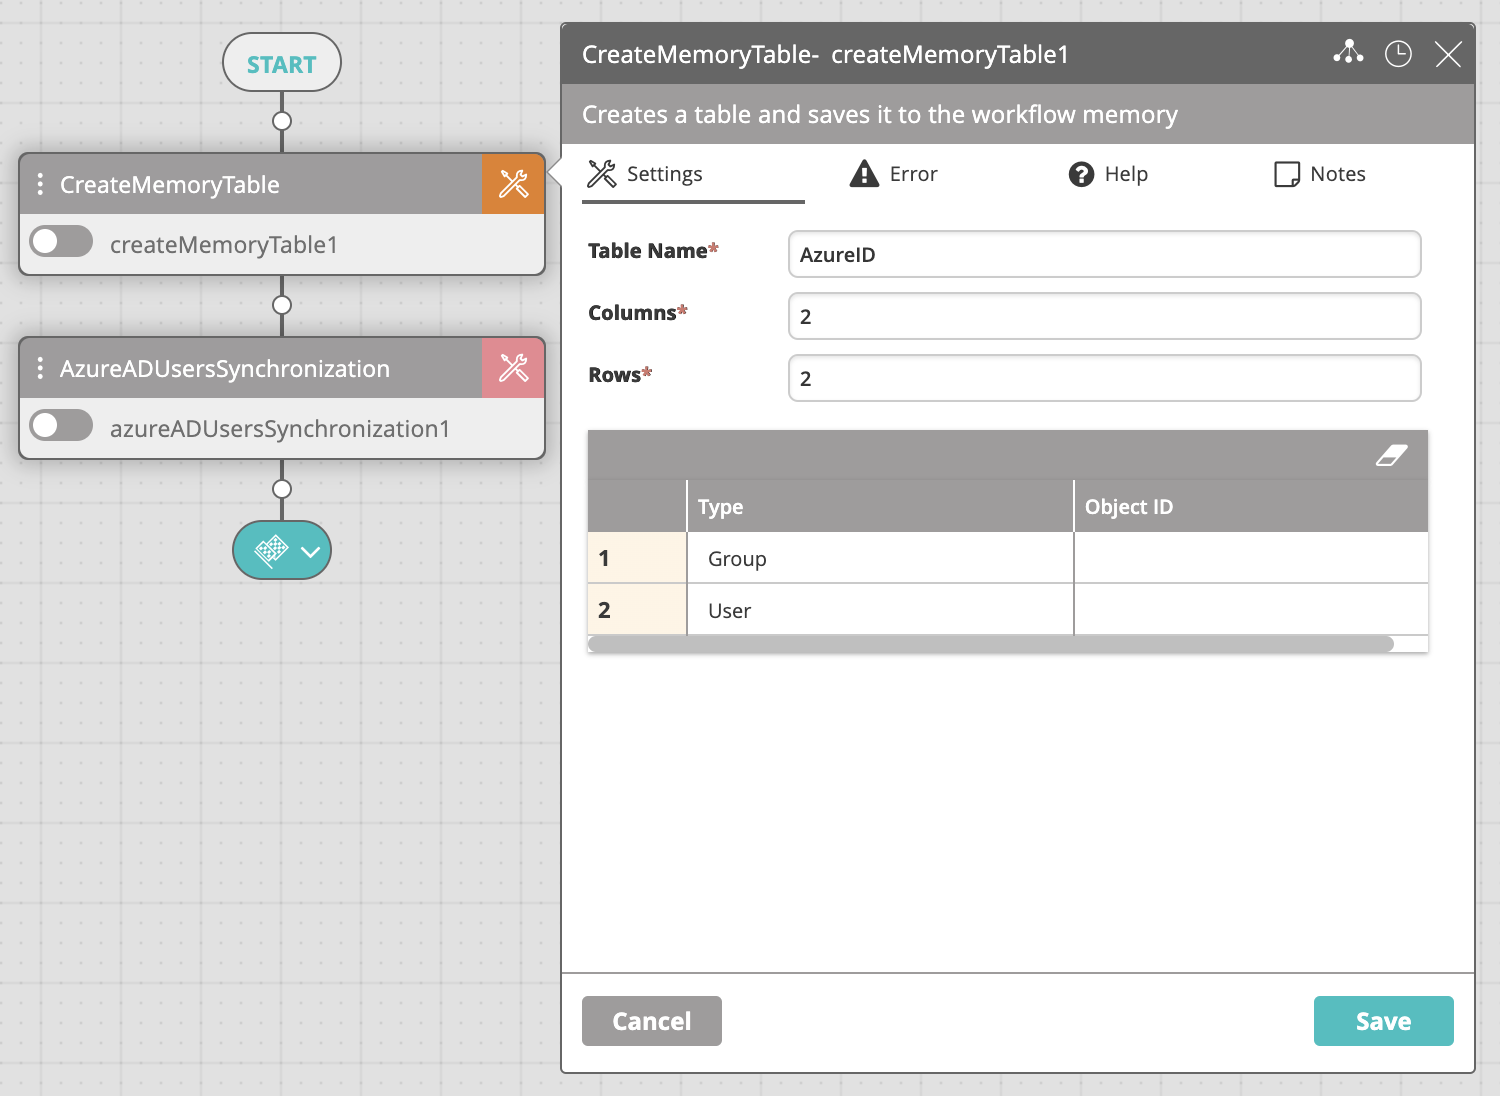
- In the Workflow Designer, create a new workflow with the following activities:
- Edit the table in the Create Memory Table activity while maintaining the following guidelines:
- The table must contain only two columns: Type, Object ID.
- Add a row for each group that you want to sync, setting Type to Group and Object ID to the ID of the specified object.
- Add a row for each user that you want to sync, setting Type to User and Object ID to the ID of the specified object.
- You may add as many rows to the table as you want.
- Edit the Azure AD Users Synchronization activity settings:
- Tenant ID: Tenant ID in Azure AD.
- App Client ID: The Application (client) ID associated with the Azure App Registration.
- Client Secret: Secret string generated within the Azure App Registration for requesting a token.
- AD Users: The list of AD users/groups to synchronize. This can be static (the object ID for a single user and/or group) or a reference to a memory table created for this purpose.
If we use the above example, the value of this field will be the Table Name field of the Create Memory Table activity:%AzureID%. - Update Existing: By default, if a user or a group already exists (has been created manually before synchronization), they will not be updated. When this is checked, existing users are updated.
- Recursive Groups: When a group is synchronized, you may decide whether to synchronize the data recursively or not. When synchronizing the data recursively, subgroups and user data are also synchronized.
In Actions Express, subgroups appear at the same level as their parent groups.
- Run the workflow.
Verifying the Synchronization
Take these actions to ensure that the synchronization was successful:
- Check the Workflow Execution Log to find out how many users were synchronized.
- Go to Main Menu > Repository > Recipients and check for recipients matching your AD entities, under Users and Groups respectively:
- The Origin column for such users shows AD.
- The Domain column for such users shows your AD domain name.
Keeping Directories in Sync
As AD records change in time, you will want to keep them in sync with the Actions Express database. You have several options to do that:
- Manually running the AD Sync workflow
- Scheduling the AD Sync workflow
- Including extra user attributes in the SAML response
Synchronizing Manually
Every next run of the workflow you created for synchronizing Actions Express with your AD updates the local records – deletes records that are no longer available, adds new records that have appeared in AD, and updates records that have changed.
You can manually run the workflow whenever you want to perform a synchronization. It is important to double-check if the Update Existing option is selected.
Synchronizing on Schedule
If you want to synchronize Actions Express with AD on a regular basis, you can schedule the workflow that you created for that purpose.
Take these steps to schedule the synchronization workflow:
- Log in to Actions Express using an admin account.
- Go to Main Menu > Workflow Designer, open the AD synchronization workflow that you created, and double-check if the Update Existing option is selected.
- Go to Main Menu > Repository > Policy Actions and create a schedule under Schedules.
See Schedules for details.
Including Optional Attributes
Another option is to manage SSO logins through group membership. After the initial synchronization of one or more groups, you can allow all current members of these groups to log in, even if they haven't been synchronized recently. You do that by configuring the SAML response to include a few optional attributes in the SSO settings of your IdP. This approach is useful when you don't want to run periodic synchronizations or you want new AD users to be allowed on Actions Express as soon as their account is created.
The attributes that the SAML response needs to include are:
first_namelast_nameactiveDirectoryId
Actions Express asks for these optional attributes when making a SAML claim. If you don't configure the response to include them, new group members will only be able to SSO after a re-synchronization.
Enabling Recipients to Log In
Synchronizing Actions Express with AD only creates recipients in Actions Express. To allow the recipients to log in to Actions Express, you need to convert them to Actions Express users or groups.
Take these steps to convert recipients to logins:
- Log in to Actions Express using an admin account.
- Go to Main Menu > Configuration > Logins.
- To add a user:
- In the Users area, click the plus sign.
- In the side panel that appears, start typing the name of the recipient that you want to add as a user and select it from the suggestions list.
Recipients originating from AD have the AD domain name included in parentheses after the name. The available user details are automatically populated. - In Role, select an Actions Express role for the user.
- Optionally, fill in the empty user details.
- Click Save.
- To add a group:
- In the Groups area, click the plus sign.
- In the side panel that appears, start typing the recipient group that you want to allow login for, and select it from the suggestions list.
Groups originating from AD have the AD domain name included in parentheses after the name.
The available group details are automatically populated. - In Role, select an Actions Express role for the group.
Child groups do not receive the role. - Click Save.
Conflicting Roles
If a user is included as part of a login group and also named individually in the Users table, the higher of the two permissions will be the one the user has upon login.
For example:
- John Doe is listed in the Users table with the role Administrator.
- John Doe is part of the Help Desk group listed in the Groups table with the role Workflow Editor.
- Upon login, John Doe will always be granted administrator privileges.
There is a known issue with deleting accounts - the user deleting the account is not always recognized as having the appropriate permissions. The user's individual role is the only one being checked, and not any group role that they are in. In such a case, if their individual role isn’t sufficient, they will not be able to delete some accounts.
For example:
- John Doe is listed in the Users table with role Operator.
- John Doe is part of the Administrators group with role Administrator.
- John Doe tries to delete another administrator account, which he should be able to do since he's part of the Administrators group.
- The delete fails because John Doe's individual Operator role is the only one taken into account, and is not sufficient for deleting an administrative account.
Enabling SSO
Configuring the IdP's details into Actions Express serves double purpose to also enable SSO. Take these steps to enable SAML SSO in your Actions Express instance:
- Log in to Actions Express using an admin account.
- From the main menu, select Configuration > Logins.
The Logins screen appears, containing multiple accordion items. - On the SSO accordion item, click the plus icon. The SSO panel appears on the right.
- Fill in the following details:
- SAML IDP URL—Enter the SAML URL provided by your IdP.
- Certificate—Click Browse and upload a security certificate file generated by the IdP.
- App Unique ID—Enter the SAML Entity ID generated by your IdP. Depending on the IdP, the Entity ID could be called App ID or something similar.
- Group Identifier—Select which directory attribute to use to identify groups: the group ID or the group name. Different IdPs might use one or the other. The ID type must match the group IDs that you enter when synchronizing Actions Express with AD.
- Click Save.
A new entry for your IdP will appear on the SSO accordion item.
Editing the SSO Configuration
When you are editing the details of an existing IdP in Actions Express, the changes come into effect immediately after saving them. Depending on what you change, you may need to resynchronize Actions Express with AD.
Take these steps to change the details of the existing configuration:
- Log in to Actions Express using an admin account.
- From the main menu, select Configuration > Logins.
The Logins screen appears, containing multiple accordion items. - On the SSO accordion item, click the entry that you want to edit.
The SSO panel appears on the right. - Change the details and click Save.
Deleting the SSO Configuration
To prevent users from using SAML SSO to log in to Actions Express, or to configure a different IdP, delete the existing SSO configuration.
Take these steps to delete the existing IdP entry:
- Log in to Actions Express using an admin account.
- From the main menu, select Configuration > Logins. The Logins screen appears, containing multiple accordion items.
- On the SSO accordion item, click the entry that you want to delete.
- In the SSO accordion item's title bar, click the trash icon and then confirm the deletion.